SharePoint Getting Started Guide
Getting started
Welcome to the Power Automate (Microsoft Flow) getting-started guide for integrating SharePoint with Build a Doc. Because SharePoint does not directly list or host custom connectors, this guide uses Power Automate to call Build a Doc.
This tutorial shows, step-by-step, how to connect the Build a Doc Power Automate (Microsoft Flow) connector to your Build a Doc subscription and create a flow that uses SharePoint to convert a Word template into a PDF with dynamically inserted data. It’s a quick, practical getting started guide; the skills learned can be applied to other Build a Doc actions.
Prerequisites
- A Build a Doc subscription and an API key.
- An appropriate Power Automate account with permissions to create flows, and access to the connectors you will need (SharePoint).
- A Word Template (Invoice) stored in a SharePoint document library. (see Word Template Syntax for template syntax). The Word Template used in this example can be found here.
- An appropriate JSON Data source, which matches the template. The JSON Data source used in this example can be found here.
Flow Overview
- Trigger the flow (manual, HTTP, or scheduled).
- Get the Word template file content from SharePoint.
- Call the Build a Doc Convert Word Document action with a valid JSON data source.
- Create the resulting PDF file in SharePoint.
- Verify the output.
Step by Step
1. Create a new flow
-
In Power Automate, click + New flow → Instant cloud flow (or choose the trigger type you need).


-
Name the flow (e.g., Build a Doc - Generate Invoice).

-
Choose Manually trigger a flow (this is the event that kicks off your flow), then Create.
2. Fetch the template file from SharePoint
-
Add the SharePoint → Get file content action (or Get file content using path if you prefer to select the file by path).

-
Within the action, select the SharePoint Site and, in the File Identifier, choose the template file from the document library (via the file picker or path field).

-
This demonstration will use the below template:

3. Add the Build a Doc: Convert Word Document action
-
Click the
+to add an action and search for the HappyWired PowerDocs connection.
-
Select Convert Word Document.
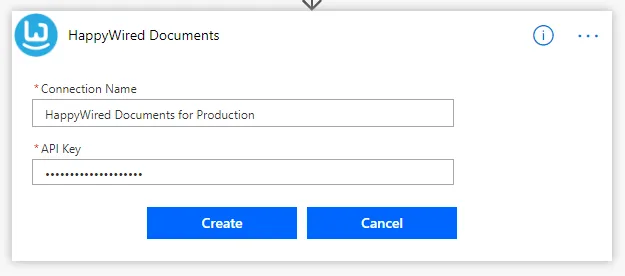
3.1 Creating the connection
- On first use, you will be prompted to create the connection. You may name the connection anything you like.
- Paste your API key, then select Create.
4. Configuring the action
- Document: Set to the output of the SharePoint → Get file content action (the
File Contentfield). - Data Source: Add a data source named
Invoice(or the name your template expects). - Format:
JSON. - Data: use the JSON object that you will insert into the template.
- Output Format: Set to
PDF.
5. Save the Output - SharePoint Create File
-
Add SharePoint → Create file.

-
Configure the Create file action:
- Site Address: select the destination site.
- Folder Path: choose the library/folder where you want the PDF saved.
- File Name: set an appropriate name and include the
.pdfextension. - File Content: map the Build a Doc action’s converted output (Base64 content).
-
If the Build a Doc action succeeds and returns base64 content as intended, the output file will be correctly created in the destination.
-
If the Build a Doc action succeeds, the PDF will be created in the destination library.
6. Test and validate
- Save and run the flow.
- Inspect the resulting PDF in your SharePoint library. It should contain the data from your data source inserted into the template and look like the example below:

Troubleshooting
Click to expand common errors and fixes
File Not Found / Permissions
Cause:
Wrong SharePoint site URL or file path, or the flow account lacks read access.
Fix:
- Re-select the file using the picker to ensure the Site Address and File Identifier/File Path are correct.
- Confirm the flow connector has permission to the document library.
Trigger Not Firing
Cause:
Flow wasn’t saved or required trigger inputs are missing.
Fix:
- Save the flow.
- For manual triggers, press the Power Automate button and provide required inputs.
- For scheduled/HTTP triggers, confirm schedule settings and request payloads.
Blank or Missing Fields in PDF / Blank Placeholders
Cause:
JSON property names don’t match template placeholders or wrong data source name.
Fix:
- Ensure JSON keys exactly match template placeholders (case-sensitive).
- Confirm your data source name (e.g.,
Invoice) matches what the template expects. - Use Compose or Parse JSON to inspect the payload structure during a run.
Conversion Errors (Word → PDF)
Cause:
Invalid file content, malformed JSON data source, template too large/complex, or authentication issues.
Fix:
- Verify
Convert Word Documentreceives valid file content. - Validate JSON schema and required fields.
- Test with a smaller template to isolate the issue.
- Set
Inline template syntax errorsparameters to Yes. - If auth errors appear, recreate the connector or refresh the API key.
Create File Fails / File Not Visible
Cause:
Wrong folder path, missing .pdf extension, or required library metadata not supplied.
Fix:
- Use the folder picker to select the destination folder.
- Include
.pdfin the filename. - Ensure the file name is unique.
Step-by-Step Checklist
- Confirm the trigger fired (check Run history).
- Inspect Get file content - correct site URL & path; action returns file content.
- Validate the input to Convert Word Document is non-empty and correct.
- Inspect your JSON data source:
- Name matches template (e.g.,
Invoice). - Keys and nested paths align with template.
- Name matches template (e.g.,
- Use folder picker +
.pdfextension + required metadata onCreate file. - Check connector auth / re-create connection if you see authorisation errors.