Sending Job Application Letters from a SharePoint List
Overview
This scenario guide demonstrates how to automate the administrative burden of managing new hire interviews and job offer follow-ups.
Managing recruitment communication can be a time-consuming and repetitive task for HR teams. Writing and sending interview invitations, offer letters, and rejection notices manually often lead to inconsistencies and human error. The objective of this scenario is to showcase the capability of Build-a-Doc in automating the creation and delivery of job application letters using SharePoint and Power Automate, reducing administrative effort and ensuring consistent and professional communication with applicants.
The video below demonstrates how an HR staff member creates and updates an applicant’s progress in SharePoint, triggering automated letters to be sent directly to applicants based on their application stage. These include an interview letter, offer letter, and a rejection letter.
Prerequisites
- SharePoint site set up ready to add lists to
- Power Platform environment/solution set up
- Power Automate premium license to be able to run custom connectors
Implementation
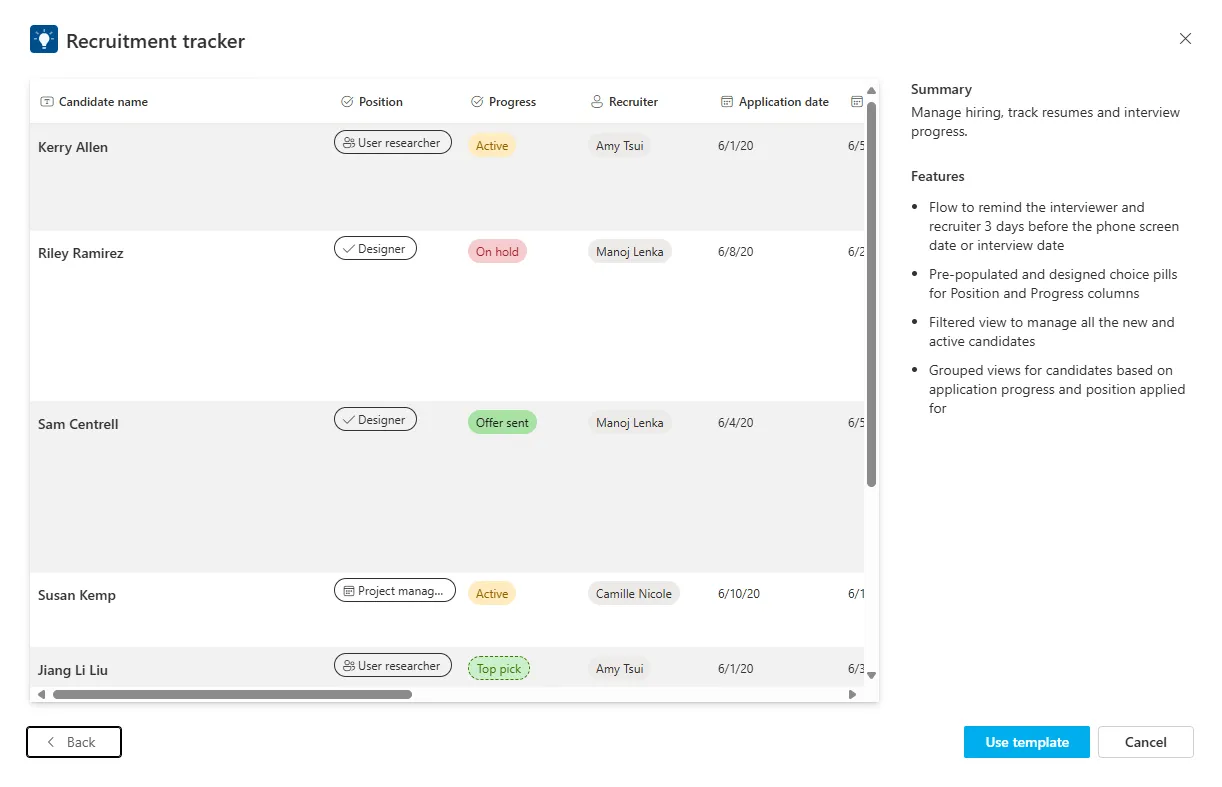
This guide uses the ‘Recruitment Tracker’ List template provided by SharePoint which will be the data source for this scenario.
Adding the SharePoint List
-
On the SharePoint Site, click the ’+ New’ and select ‘List’ from the dropdown. Then scroll down and you will find ‘Recruitment tracker’ in the Templates section and click ‘Use template’, you can then name it as required and select the option to show it in the site navigation.
-
After this you can skip any of the features SharePoint asks to add, these are not required for this scenario.
-
The template is useful, but it does not include all the information needed for the letters. The most significant missing field is the candidate’s email address, as an email address is needed to know who to send these letters to. Add the following columns with the ‘Add column’ button next to the last column:
- Candidate email (Single line of text)
- Start date (Date and time)
- Work hours (Single line of text)
- Weekly hours (Single line of text)
- Contract length (Single line of text)
- Salary (Currency)
The most important one here is ‘Candidate email’ as this is what will be used in the flow to dynamically send emails to the correct applicant. The rest of the fields can be customised to your needs and what your letters need, this is just the data that is being used in this example.
Document Templates
The document templates have been stored in the same SharePoint site for this demonstration so that everything is in one place. The templates in this scenario are an interview letter, offer letter, and a rejection letter. The one that will be used by the flow depends on the “Progress” field of the applicant.

Power Automate Flow
The flow will be handling most of the scenario and it will be where the Build-a-Doc custom connector will be used to handle the templates and data from SharePoint.
Trigger
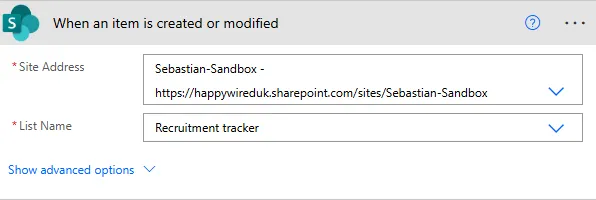
Use the SharePoint “When an item is created or modified” trigger. There is no trigger for just modification provided by Power Automate, so the only available option must be used. Connect this trigger to the SharePoint site the list is located in, then you will be able to see the list in the next dropdown to be selected.
Actions
-
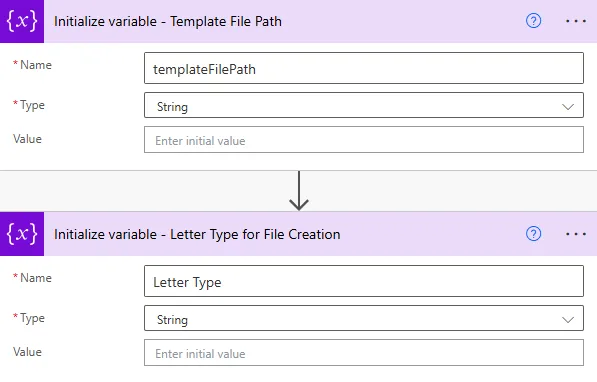
Use two “Initialize variable” actions for the file path of the template and the type of letter that is being sent out. This prevents having redundant actions in the switch control later, allowing for a single instance of the Build-a-Doc connector rather than reusing the same action across the different switch cases.
-
Now use the switch control that was mentioned in the step above. This will be on “Progress” from the trigger. This will let the flow know which template needs to be used to generate the appropriate document for this applicant.

-
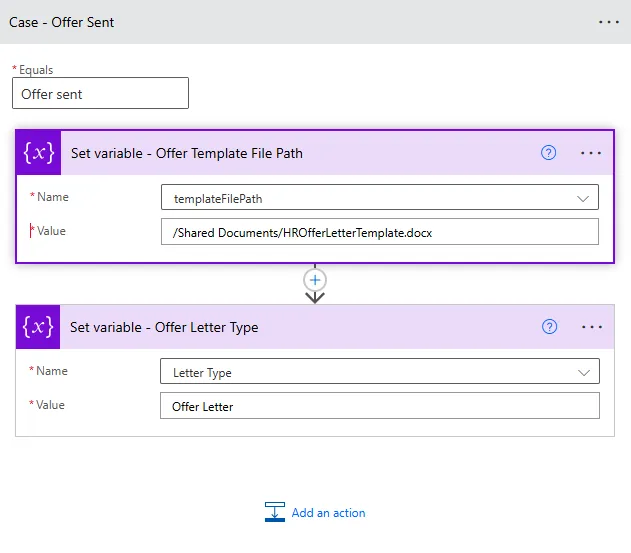
Under each case, set both variables initialised earlier before the switch. Use two “Set variable” actions under each case, for template file path, in the value use the appropriate file path from SharePoint that will link to the appropriate template. For example, “/Shared Documents/Templates/HROfferLetterTemplate.docx”. The second variable “Letter Type” then would be “Offer Letter”. Make sure you use the appropriate values depending on the case you are on.
-
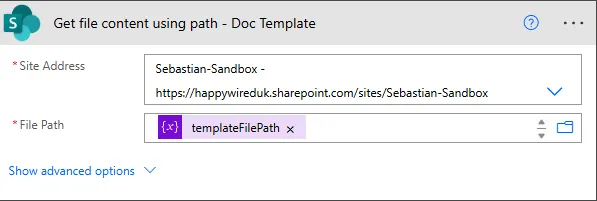
Next, outside of the switch control, use the SharePoint “Get file content using path” action. Select the SharePoint site where your template is stored from the dropdown, then in value use the variable you set for the file path, i.e. templateFilePath.
-
Now, use a Build-a-Doc action to generate the document with the data we have gathered from the SharePoint lists. For this scenario use the “Convert Word Document” action as the templates are Word documents. In the Document section select “File Content” to put in the extracted template from the previous action and make sure the “Output Format” is set to the format you require.
Click on “Show advanced options” to expand the action and see where you can put your data sources in the following format:
Data source Name - The name to reference this data source in your template Data source Data - The raw data you want to use, in our case we are using the bodies of our get actions Data source Format - The format of the data you are using, in our case JSON
You can add as many data sources as required, but make sure they are named appropriately.

-
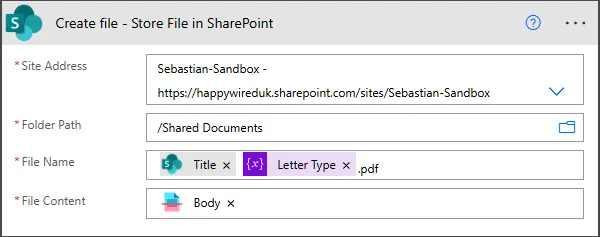
Next, use the SharePoint “Create file” action and fill in the values with your SharePoint site and folder path in your site. For the file name, use the applicant’s title and name, along with the letter type so that you can easily distinguish between different files. Then lastly in “File Content” use the body from the previous action (the Build-a-Doc connector).
-
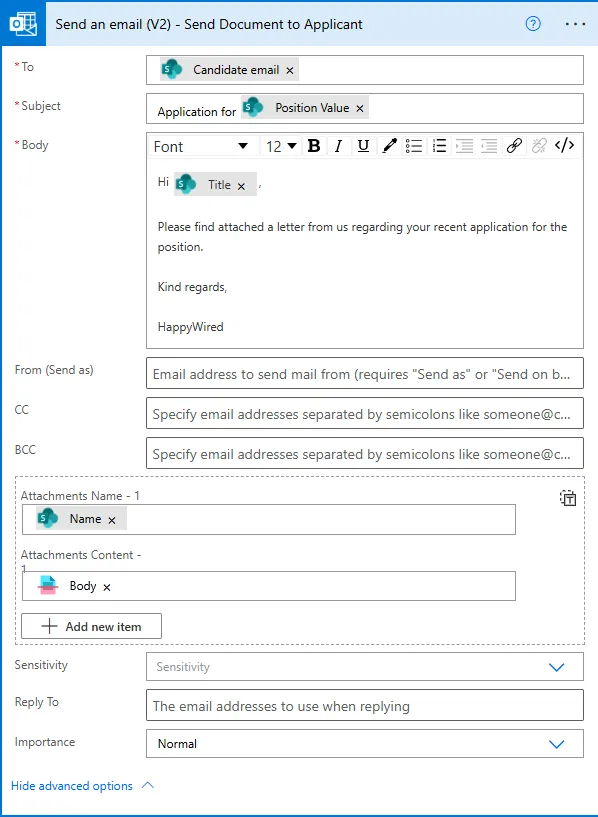
The final action for this flow will be to send an email to the applicant with the corresponding letter attached. Use the ‘Email’ field from SharePoint to specify the applicant that is receiving the email and fill in the subject and body according to your needs. As you can see in the example, dynamic content is used to reference information about the applicant and vacancy so that it can apply to multiple applicants.
To find the attachments section, click on “Show advanced options” to expand the action like we did earlier. For “Attachments Name”, use the ‘Name’ from the “Create file” action so it will match what is in SharePoint and will also include the file format. Then for “Attachments Content”, use the body again from the custom connector like we did in the action before.
Following these steps will allow you to automatically send job application letters to applicants by handling the data through SharePoint and managing the progress of an applicant.
Run
To run the process, create a new item in the SharePoint list. Fill in all the necessary columns like in the video, then set the Status column to a value used in the flow, e.g. ‘Active’, ‘Rejected’, etc. Always fill in the column for email, otherwise the flow will fail as it won’t know who to send the letter to.
Additional ideas/Advanced scenarios
In a more advanced scenario, try using custom SharePoint lists to tailor the process to your specific business needs and what you need to include in your documents.
For example, a custom list for job applicants and another custom list for job vacancies allows you to just have columns that suit your business needs. Then use a lookup column in the job applicants list to connect to the job vacancies, providing another data source for the flow.
Uses
Actions
Convert Word Document
This guide uses the Build-a-Doc Convert Word Document action, allowing for data to be collected from a data source and dynamically insert the collected data into documents.